Showing posts with label review. Show all posts

Sunday, 21 April 2013

Merrell Chameleon 5 GTX

I was recently approached by Merrell, after they had read my review of the Chameleon wrap slam shoes and asked if I would like to review their new Chameleon 5 GTX. 


Merrell Chameleon 5 GTX
The Chameleon 5 GTX are a very different shoe to the wrap slams, the GTX come with a Gore-Tex membrane and something I've not heard of before; the aegis microbe shield, the swing tab describes the aegis microbe shield  as:- 

The Aegis microbe shield is a revolutionary bonded antimicrobial technology which protects against odour, staining and deterioration caused by bacteria, fungus and other microorganisms.

The shoes weigh about the same as the wrap slam; around 510g, not the lightest hiking shoe but not the heaviest either and lighter than a leather boot.

The shoe is made up of suede leather and mesh, with a rubber rand on the toe front to protect against knocks, a vibram sole which looks to have a deeper cut tread than the wrap slams and a bellow tongue, along with metal hook and lacing eyelets, which I prefer rather than the laces attaching to the the shoe material.


Upper and Sole
There is also an external heel stability arm which aims to help on uneven ground, there is also a thin anti-bruise foot plate which runs the length of the shoe and aims to help when carrying a pack.


External heel stability arm
This is the third pair of Merrell's I've had and as usual, they come up a half size smaller than my usual size of 11.5, so that a size 12 give me a correct fit.

So far I have put around 10-12 miles on these shoes; mainly in an urban environment and they have proved to be pretty comfortable although with any shoe that has a waterproof membrane, my feet did feel a little hot at the end of a walk.

I'll continue to wear the shoes over the next few months and will have a fuller report then.

These shoes were supplied free of charge by Merrell and are available to buy at Fitnessfootwear.


Sunday, 30 September 2012

Almost two years

Well I got almost two years out of the Merrell slam wrap trainers before killing them

I've worn these trainers pretty much everyday in that time, this includes my six mile round trip to work five days a week and all my urban walks in that time.

The main part of the trainers are find, with hardly any wear, it's just the soles that have worn out.

Posted via mobile Blogger.


Friday, 25 November 2011

Review: Berghaus Terabyte 25


I was contacted by a representative for Berghaus and asked if I would like to review some rucsacs for them, I have the choice of a few but decided that the Terabyte 25 would fit my usage the best.

The Terabyte is marketed as a sac for the urban environment; which means that it has a lot of pockets inside and outside.


Internal pockets
There are two compartments that make up the main body of the sac; one has five open pockets and one large zipped pocket.


The other compartment is designed to take a laptop, this compartment is made up of a material called 'd3o intelligent shock absorption'.  The swing-tag quotes d3o as being 'soft & flexible but on impact its intelligent molecules lock together to absorb impact energy'


This compartment also has a pocket for a hydration bladder with the outlet hole at the top of the sac.


The rest of the sac is pretty much standard for a daysac, a couple of zipped pockets on the outside, mesh pockets on the sides, a hip-belt and chest strap although personally I can't see the point of either of these on such a small sac; luckily both can be removed.


The shoulder straps are a bit on the thin side but are well padded and are comfortable. 
d3o computer pocket


The back has flow technology which is mainly ribbed foam on either side of the sac to create a channel up the middle to allow airflow.


Over the next month, I will be using it as my main sac for work; which means carrying amongst other things, waterproofs, eye-glasses, packed lunch, first aid kit, a kindle, phone charger and assorted batteries and chargers.


One extra to add is that this sac will be compared to a 15+ year old Berghaus Dart 35; as this has been my everyday sac for that time, and as yet I haven't found a sac to replace it.

More can be seen at the Berghaus website.

Tuesday, 15 November 2011

North Face Resolve Jacket Final Review

I've had the jacket for roughly 4 months now and over the last few weeks it have been getting pretty regularly outings with the wet/damp days we are having.

This jacket was originally supplied by Go Outdoors on a review and keep basis, and the early reviews can be seen here and here.

The jacket has done the job it is intended for i.e. it keeps me dry when its been raining.  And although it hasn't had a great deal of time out on the hills it has had a good workout around town.

The hood problem hasn't been a problem since I fixed it (see second update) using a hair tie, but it would be nice if North Face added some type of hood reducer in future models.

There has been some build up of condensation on my walks to work but nothing that has been that bad, even with a pack on and the rain coming down.

I still think that is jacket is a good mid-price waterproof that works most of the year round.

Monday, 12 September 2011

Update:North Face Resolve Jacket

I've had the jacket for about a month now; and luckily in that time we have had some heavy rain down here in London.

The jacket has performed really well in keeping me dry on a couple of days on my 3 mile walk to work, and the mesh insides have helped to move and keep most sweat away from me when cocooned in side the jacket.

One problem I did mention in the first post was that I find the hood to be to big and cinching it in didn't really help.  I looked at a couple of ways to reduce the hood, one was to attach Velcro to it, but this would mean either having to sew into it and then have possible water entering through the needle holes or to use sticky Velcro but this could end up coming of with to much rain getting on it.

The solution I came up with, was to place a hair tie on the inside to reduce the volume.


This may not look pretty but it does the job of reducing volume and stops the hood flopping over my eyes.


Unlike the first time that I wore the jacket

Overall I'm pretty happy with the way this jacket preforms and will be my go to jacket for the foreseeable future.

Saturday, 13 August 2011

Review: North Face Resolve Jacket

This review item has been supplied by Go Outdoors.

Whether you are out on the hills or walking about a city, one essential piece of equipment during the Great British Summer is a waterproof jacket.

The North Face Resolve is a typical lightweight Summer waterproof, breathable and seem-sealed jacket.

It is made from The North Face's own ripstop nylon HyVent, which according to the swing tag is highly waterproof, has exceptional breathability, and exceptional durability.

The inner of the jacket has a mesh lining throughout the body; and nylon lining in the arms.

It has is a roll-away type hood and a fleece lined inner collar.

There are also two large hip pockets but no map pocket.

A double storm flap over the full length zip. 

The Jacket weighs just under 500g for a XL.

Very small toggle on hood cinch cord

I haven't have a great chance to wear this as typically since receiving it, the weather hasn't been to bad here in London.

With what little rain I have used the jacket in, it has coped pretty well with and kept me dry.

Some small niggles I do have was it are that the hood is quite large and even cinching it in, the wind can get into and cause it to bellow up.

The cinch toggles on the hood are very small and difficult to find and grip to pull in, especailly when you compare it to the hem draw toggle.

 Hem Draw Toggle

The two hip pocket are more than large enough to easily carry things like mobile phone and a snack bar and still have room for your hands to fit in.

The lack of a map pocket doesn't bother me as I never use them, I prefer to carry my map in hand or in my backpack.

I will continue to test the jacket over the coming months and report back.

Go Outdoors have a full range of Waterproofs from the budget end right through to high end products like Paramo.


Wednesday, 29 June 2011

Review: Primus ETA Express Stove

This review item has been supplied by Go Outdoors


The whole kit

Technical Information

• Very fast boil time
• Low fuel consumption
• Environmentally friendly
• Extremely low total weight
• 2600W•8900 BTU/h

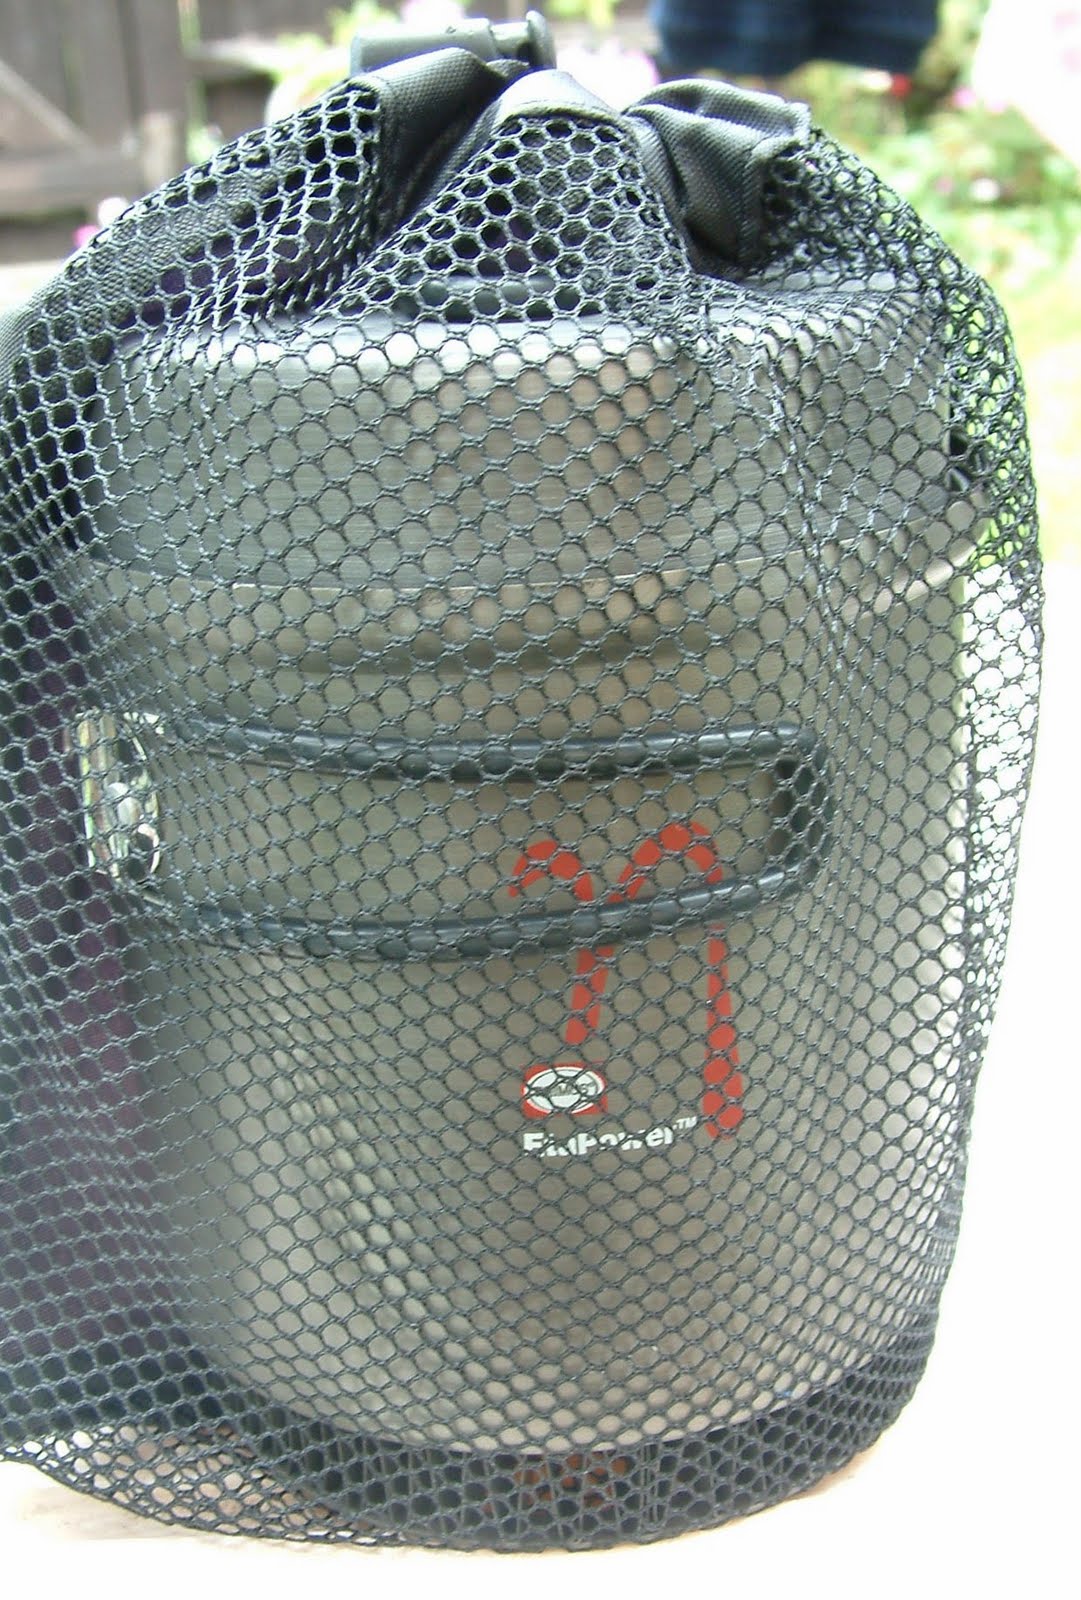
The EtaExpress Stove System comprises of 4 main elements; a 1L pot, a lid/frying pan, an express stove burner and a dedicated windshield.

All elements fit inside the 1L pot and this can also take a 100/250 gas cannister which then all go inside the supplied stuff sac.

One at a time

Burner - The burner is a typical 3 legged, screw on top gas burner, in fact it is the same one that I bought a couple of years ago, with the only difference being that this one has a Piezoelectric starter.

As expected from Primus the build quality is second to none, with strong sturdy pot legs and the gas control knob being made of a strong plastic, the electronic starter switch also has a robust feel to it. One thing to note is that the gas control and the starter are at 180° to each other and to fire the starter you pull the switch down.

1 Litre Pot and Lid/Frying Pan - Both the pot and lid are covered with a triple layer 'Titanium non-stick' surface. Both have grab handles attached; although the one on the lid can be removed. I much prefer the handles to be attached as it means I'm not constantly looking for a grab handle.

The 1l pot also has a heat exchanger attached to the bottom to help speed up cook times. Although the pot is 1l in size it's not much taller than my 750ml Vargo ti-pot and this helps to keep it pretty stable on the stove.

Most of my cooking is of the re-hydrate kind and usually only needs 300-400ml of water for this; so a 1l pot does seem to be quite big. Although saying that if there were two of us, it would probably be ideal.

Is it a lid? Is it a frying pan?

Eh; it's a lid. I do think that it is pushing it to call it a frying pan, yes you could fry an egg in it but you would struggle to get a couple of rashers in there.


Heat exchanger

Windshield - One of the biggest problems with top mounted gas stoves is that protecting the flame can be difficult as to place a windshield around the flame without also covering the gas stove.

Primus have come up with the idea of a windshield that clips to the gas cannister and help to protect the flame. This one is made of two pieces of metal held by another piece of spring loaded metal (this can be seen in the top photograph).

When all these elements come together they help to make the EtaExpress Stove a pretty fast stove, on the couple of times used I have had boil times around the 2-3 minute mark with a 100 cannister.


All together


Remember my comment about the positions of the starter switch and the control knob?

When the windshield is fitted to the gas cannister it is almost impossible to get to the starter switch.


As you can see from the picture above the switch is on the inside of the windshield and to get to it, you have to put your finger around the back to flick it. This is while you have the gas turned on, and it is igniting near your hand.

I have tried this a couple of times and on one occasion I nearly pulled the lit stove on to me. After this I had a look around the internet to see if I was doing something wrong; although the picture on the box showed I did have the windshield fitted correctly.

Once on the net I found that there seems to be two different windshields and I'm guessing that one was the original design and the one I have is the newer design.

New and Old designs

The old design has extra holes in it so that it sits on the potstand legs, and this leaves both the control knob and starter switch free and easy to get too.

Apart from this one problem the EtaExpress looks to be a very quick stove and the low weight (450g) makes it a good all round solo cooking system.


Monday, 13 June 2011

Review: Mud, Sweat and Tears by Bear Grylls

This is a bit of a strange book to review; in the sense of I feel than Bear Grylls doesn't seem as though he wanted to give too much away.

The book opens with introductions to Bear's lineage; from his great-grandfather through his grand-parents to his parents; the social circles they moved in and the apparent influence they had on his life.

His early life and school is covered in the first 34 chapters; yes, that right 34 chapters! But this is only roughly the first 120 pages; as the chapters only average 2 or 3 pages.

The time-line moves along at a fair pace from boarding school to Eton, to University then on to his decision to join the SAS.

Up to this point in the book we only get short anecdotes and glimpses of his life.

The next 28 chapters (108 pages) are taken up by the telling of his selection for the SAS(R), the start of this section is prefaced with a note about how he sign the Official Secrets Act and how he is restricted on revealing details of the SAS.

This is only one of two parts within the book that his passion seems to come through; and you start to get a feel for the person, but again we only get small anecdotal stories, mostly centred around the training and the long route marches. Again there are plenty of bones but not a lot of meat on them.

Both Chris Ryan and Andy McNab have covered the SAS and selection in their books with much more insight.

The next 35 pages cover almost a period of two years, in which Bear breaks his back, recovers and meets his future wife and prepares to climb Everest. Quite some big events to squeeze into 35 pages!

The second part to play a big part in the book and show his passion is the climbing of Everest (115 pages). Again we get to see the commitment and passion that drives him on, and making him (at the time) the youngest Brit to summit Everest.

The remainder of the book (40 pages or so) concentrates on his marriage, his motivational talks and the start of Born Survivor.

I have to admit that I had never heard of Bear Grylls before his T.V. Series; Born Survivor, and was hoping that this part of his life would be covered but again this becomes a footnote.

Bear has been criticised about 'faking' within the shows and although mentioned he doesn't really have much to say on the subject.

And then on to the Epilogue; which goes on to mention, first team to cross the frozen North Atlantic Arctic Ocean, flying powered paragliders above Everest, and an expedition through the Northwest Passage in a rigid inflatable boat but these only get one or two line within this chapter, I would of like to hear more of these stories as this is the Bear Grylls I know from the T.V. Maybe they are being saved for Volume two.

I was looking forward to reading this book but have come away slightly disappointed. If you already know about his time in the SAS and the climbing of Everest (which was covered in his book Facing Up) then personally I think you won't find much more about the life of Bear Grylls.


On a sidenote, I was approached by Transworld Publishers about reviewing this book; the reasons for accepting this offer was 1. I get the chance to read the autobiography of Bear Grylls and 2. I was also offered a second copy to run a competition on the blog for one of my reader's to win.

Although the review copy turned up; the second copy never did, even after I had been back in touch with Transworld Publishers.


Thursday, 26 May 2011

TRION:Z

I was asked if I would like to try a TRION:Z dual loop bracelet and then review it for the blog.

First port of call was the Trion:z website to find out some more information.

"Designed to balance the body's magnetic and electrical fields, Trion:Z combines the therapeutic properties of magnets and negative ions, bringing you the most powerful complementary health product on the market today."

This is what the site has to say about the dual loop bracelet
Trion:Z’s original dual therapy bracelet combines Trion:Z’s patented Ionic AND Magnetic therapy into one unique and stylish wristband. With TWO identical loops of Negative Ion releasing “Mineon Health Fibre®” and twin patented ANSPO orientate therapeutic magnets, making it the most powerful ionic wristband on the market.

FEATURES
Dual Loops of Mineon Health Fibre® Negative-Ion producing material:
50- 100 stronger than any other product on the market 2 x 1,000 Gauss Magnets with patented ANSPO technology
Over 20 stylish colour combinations
The theory behind magnet therapy is that when a magnet is placed around a specific joint or body part, more blood is attracted to that area, leading to an increase in oxygen and nutrients. The combination of increased oxygen and nutrients leads to a faster healing process.

Well that's most of the scientific spiel out of the way; so how has it worked for me?

I have to admit that I am sceptical when it comes to things like negative ions and magnetic therapy's, I have tried magnets in the past for pain relief and found they didn't work.

Also the website and information that comes with the bracelet doesn't seem to make any real claims that the bracelet will improve performance or help with pain relief.

At present I'm walking roughly 15-25 miles a week: I also have a few little niggly pains in my knees and ankles.

So far I have worn the bracelet 24/7 for the last week and have to say that it has done absolutely nothing for me.

I don't find that the walking time has improved or that my recovery time has got better, the niggly pains are still there.

All I can say about the bracelet is that its a fairly nice design; I usually wear some kind of bracelet, be it this one or my usual Cobra bracelet.

The only other thing to say is "Your Mileage May Vary"


Thursday, 12 August 2010

Chameleon Wrap Slam Update

I have been wearing these shoes for the best part of a month now; mainly on day walks to the local woods and on the urban walks I have been doing.

The walks range in distance for a couple of miles up to the longest which was about 6 miles. Terrain has consisted of woodland path to normal city concrete pavements.

There has been very little rain in the South over the month; so testing the shoes in the rain has been impossible, As there is no waterproof liner, I would expect the shoes to get wet in wet condition. I would allow expect them to take a while to dry out, as they are quite a well padded shoe.

Padding detail

The wrap design on the shoes help to fit the shoes better to your feet and this with the high amount of padding does help to give the shoe a boot-like feel.

Wrap detail

I found the sole to be quite stiff; just like a boot's sole; which along with the rather chunky vibram sole did give good protection on hard surfaces; although on the longer walks I did find that the stiffness and lack of flexibility did seem to make my feet ache more that normal for the distance.

In my initial report I did say that I thought the shoes where on the heavy side, after wearing them for a time, I still think this. They are heavy enough to know you are wearing them, especially when going up hills or climbing stairs.

Although the shoes are comfortable and give good foot support; I don't think they would be my 'go to' shoes for walking mainly because of the weight and the stiff sole, I have gotten so use to a light shoe and flexible sole.

I see the Merrell Chameleon Wrap Slam trainers as possibly a good shoe for somebody who wants to move away from a full boot but isn't sure that the super lightweight shoes are for them; obviously something like a Sealskin or Goretex liner would be needed, as I can't see these being quick drying.

Thanks to Adam and Fitness Footwear for the chance to test & review the shoes.

Sunday, 8 August 2010

Sea to Summit X-Series

Occasionally I get asked if I would like to test and review equipment, other times I will see something that interests me and I will contact the supplier/manufacturer to see if it would be possible to have an item to test/review.

Burton McCall were nice enough to send me a set of the Sea to Summit X-Series Mug, Bowl and Plate.

For years I always carried two cook pots; one of meals and the other a small one for doing 'brews'. The main reason for this was that when using homemade dehydrated meals, they needed to soak for an hour or so, and this ment that one pot was not usable in this time.

I did for a time use just one pot and a plastic bowl but it would not always fit into pockets easily and occasionally pressing to hard on the pack would crack the bowl.

I did also for a time try the Orikaso set of mugs and bowls but never got on with these.

So after seeing a x-bowl on this year's TGO Challenge I though this maybe the ideal solution for the way I cook.

The best way to do this review is do the items individually; So I will start with the X-Mug.

X-MUG

Weight: 52 g
Size: 20mm x 110mm (when flat) 85mm x 110mm (when open)


The X-mug is made from food grade silicone material, this means that it won't taint any liquid that is placed into it.

The mug has a nylon rim to help give rigidity to the mug. The mug is calibrated on the inside in ml and cups, so can be used as a measuring cup. The measurements show from 100 ml to 480 ml.

It will hold 480 ml (2 cups) of liquid but this will take it to the top of the mug; Personally I only fill it to about the 350 ml (1 1/3 cups) this is because where you pick the mug up normally i.e by the sides the mug squishes sightly and can cause the liquid to overflow. The mug can be picked up by the rim but you need to have fairly big hands to do this.


Comparing the x-mug to my old mug; the x-mug will hold sightly more liquid but does weigh a few grams more. But it is much easier to pack away inside a pack or even in a trouser pocket.

Old & New

I do have one niggle and one concern with the x-mug; the niggle is that although the mug will take quite high temperatures, it doesn't seem to hold the heat particularly well. I wouldn't expect it to hold heat like a insulated mug but I found that the heat disperses quite quickly; even quicker that the old plastic mug I normally use. Now I don't know the reason for this; it could be the the walls of the x-mug are quite thin or it could be that silicone don't retain heat particularly well.

The concern is how resistant the silicone is to puncture; I like to have my brew kit close to hand which means I carry it in the outside pockets of my pack. Packs can sometimes get snagged on items like gates, stiles and the odd bit of barbed wire and this could puncture the x-mug; I know this may never happen but I think about these things.

Pros: light and compact, holds a good amount of liquid

Cons: Doesn't seen to keep liquid hot for very long, possibly easy to puncture

X-Bowl

Weight: 86 g
Size: 15 mm x 150 mm (flat) 60 mm x 150 (when open)


The X-bowl is made for the same materials as the X-mug the only difference being that there is no nylon rim; the nylon this time is in the base of the bowl.

The base of the bowl can be used as a cutting board, if you are someone who like to cook and prep fresh food out of the trail.

Again the bowl is calibrated to use for measuring, and shows from 100 to 500 ml.

The bowl can hold a maximum of 650 ml; and you can use virtually all of this, as this time as you are more likely to hold the bowl in the palm of your hand.

I used the bowl for a breakfast (Oat So Simple) and a homemade dehydrated meal and neither of these meals came above the 400 ml mark.

X-Bowl & Breakfast

But once again I found the the meals seems to get cooler quicker than in either a traditional bowl or my Vargo ti-lite mug.

Pros: light and compact, small pack size

Cons: Doesn't seen to keep food hot for very long


X-Plate

Weight: 152 g
Size: 15 mm x 220 mm (Flat) 38 mm x 220 (open)


Again the X-plate is made from the same silicone and nylon, as the other two items. Because of it's bigger size, you get a much bigger cutting board and the plate will hold 1170 ml.

Now I have to admit the I can't really find a way of fitting this plate into my backpacking set-up. It has nothing to do with the weight or the size but more to what I would use it for.

Most of my meals on trips are 'heat and eat' so the X-bowl would serve this purpose 99.9% of the time.

I could see the plate being used on 'Glamping' trips with the family; when having 'proper' meals in a tent.

Pros: light and compact, good if you like a large plate

Cons: doesn't really fit in with my type of backpacking


Overall I see the mug & bowl to be a good addition to my backpacking kitchen.


Flattr this